")
Is your garage door not working? You might just need to reset it quickly. Today, we will talk about how to reset garage door remote quickly and efficiently.
Don’t worry if your garage door suddenly won’t open. Most problems can be fixed in a matter of minutes. You can often fix your garage door remote by just resetting it, which will restore the connection and get everything working again without needing to call a technician.
One of the easiest things homeowners can do to fix their garage door is to reset the remote. This guide will show you the quickest ways to fix your door if you’ve just moved into a new house, lost your remote, or it stopped working after a power outage.

How Garage Door Remotes Work (Quick Overview)
Using a garage door remote makes it easy and safe to open and close your garage door. Radio frequency (RF) signals are used by these devices to communicate with a receiver located inside the garage door system. Pressing the button causes the remote to send a signal to the receiver, which recognizes the code and turns on the motor to move the door. This signal is typically sent between 300 and 400 MHz.
Due to the possibility of signal copying, older remote controls that relied on fixed codes presented security risks. Rolling code technology is now used in modern remote controls, which create a new code every time the button is pressed. This prevents unwanted access by guaranteeing that your garage door can only be operated by your remote.
The procedure is nearly instantaneous and provides convenience and comfort. You can better appreciate garage door remotes’ balance of dependability, security, and ease of use if you know how they operate.
4 Common Reasons Your Garage Door Remote Isn’t Working
There are several situations where you may need to reset your garage door remote to keep your garage door system secure and functioning properly.
1. Lost or Stolen Remote
One common scenario is when you’ve lost your remote or it has been stolen. In such cases, resetting the remote ensures that the lost or stolen device can no longer operate your garage door, protecting your home from unauthorized access.
2. Moving Into a New Home
Another reason to reset the garage door remote is when you move into a new house. The previous owners might still have access to the garage through an old remote. Resetting the remote and reprogramming it for your specific opener ensures that only you and those you trust can control the garage door.
3. Malfunctioning Remote or Connection Issues
You may also need to reset your garage door remote if it begins to malfunction or the door doesn’t respond as it should. This can happen due to interference from other devices or if the remote’s programming has been corrupted. Resetting the remote can often restore proper functionality and eliminate these issues.
4. Upgrading or Replacing Equipment
Finally, if you’re upgrading your garage door opener or installing a new one, you’ll need to reset the garage door remote to sync it with the new system. This ensures that your remote works seamlessly with the upgraded hardware, providing you with reliable access to your garage.
")
Identifying Your Garage Door Remote Type
Before resetting or programming your garage door remote, it’s important to know which type you have.
- Single-Button Garage Door Remotes: Single-Button Remotes control one garage door and are ideal for single-door homes.
- Multi-Button Garage Door Remotes: Multi-Button Remotes can operate multiple garage doors or even other devices like lights.
- Universal Garage Door Remotes: Universal Remotes work with different brands and models, making them great replacements or all-in-one solutions.
- Keychain Garage Door Remotes: Keychain Remotes are compact and portable, easily attaching to your keys for quick access.
To identify your remote, check for a brand name or model number on the back or inside the battery compartment. You can also refer to the user manual or search online using the model number to confirm compatibility before performing a reset or programming.
Quick Fix Checklist (Before Resetting)
Before you reset your garage door remote, try these quick fixes — many common issues can be solved in seconds:
- Replace the batteries: Weak or dead batteries are often the main cause of a nonresponsive remote.
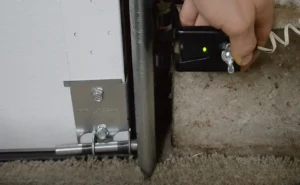
- Check the antenna direction: Make sure the antenna on the garage door unit is pointing downward and not blocked by debris.
- Test the wall control: If the wall switch works but the remote doesn’t, the problem is likely with the remote itself.
- Stand within 10 feet of the unit: Ensure you’re close enough for the remote signal to reach the receiver.
If the remote still doesn’t respond after these steps, proceed with the reset process to restore the connection.
Step-by-Step Guide for How to Reset Garage Door Remote (Universal Steps)
Resetting your garage door remote is a simple process that can be done in a few easy steps. Follow this guide on how to reset garage door remote to ensure your system is secure and functional.
Step 1) Locate the Garage Door Opener's Learn Button
The first step in how to reset garage door remote is to find the “Learn” button on your garage door opener. This button is typically located on the back or side of the opener unit, near the antenna wire. It might be covered by a small panel that you’ll need to slide or lift open.
Step 2) Press and Hold the Learn Button
Once you’ve located the Learn button, press and hold it for about 10 seconds. You may notice a light next to the button that either blinks or stays solid. Holding the button will clear the opener’s memory, which means any previously programmed remotes will no longer work.
Step 3) Reprogram the Remote
After clearing the opener’s memory, you’ll need to reprogram the remote. Press the Learn button again, but this time hold it for just a second or two until the light comes on. Immediately after, press the button on the garage door remote that you want to program. The light on the opener should blink, indicating that the remote has been successfully synced.
Step 4) Test the Remote
To ensure the process was successful, test the remote by pressing the button you programmed. The garage door should open or close as expected. If it doesn’t, repeat the steps above to ensure the remote was properly programmed.
Specific Instructions for Popular Garage Door Remote Brands
When it comes to resetting your garage door remote, the process can vary depending on the brand of the opener and remote you have. Below are specific instructions for performing a garage door remote reset for some of the most popular brands
LiftMaster and Chamberlain Garage Door Remotes Reset
LiftMaster and Chamberlain are two of the most common brands for garage door openers. To perform a garage door reset remote for these brands:
")
- Step 1: Locate the Learn Button: On most LiftMaster and Chamberlain models, the Learn button is located on the back or side of the opener unit, usually near the antenna.
- Step 2: Press and Hold the Learn Button: Press and hold the Learn button until the LED light beside it turns off (usually around 6 seconds). This will erase all previous codes.
- Step 3: Reprogram the Remote: Press the Learn button again (it should light up). Within 30 seconds, press and hold the button on your remote that you want to use. The opener light will blink, indicating that the garage door remote reset was successful.
In addition to remote reset, we have another guide on how to properly program the Liftmaster garage door opener. You can also read that.
Genie Garage Door Remote Reset Process
Genie is another popular brand with a slightly different process:
- Step 1: Locate the Learn Code Button: The Learn Code button on Genie openers is usually behind the light cover or on the motor unit itself.
- Step 2: Erase Existing Codes: Hold down the Learn Code button until the indicator light stops blinking (about 10 seconds). This clears all existing remotes.
- Step 3: Program the Remote: Press the Learn Code button again, and then press the button on the remote you wish to program. The indicator light will blink, showing that the garage door reset remote process is complete.
Craftsman Garage Door Remote Reset Process
For Craftsman garage door openers, which are often similar to LiftMaster:
- Step 1: Find the Learn Button: It is usually on the back or side of the opener unit.
- Step 2: Clear All Remotes: Press and hold the Learn button until the indicator light turns off (about 6 seconds), clearing all previous settings.
- Step 3: Reprogram Your Remote: Press the Learn button again, then immediately press the button on your remote. The opener light will flash, confirming the garage door remote reset.
Wayne Dalton Garage Door Remote Reset Process
Wayne Dalton openers have a unique procedure:
- Step 1: Locate the Program Button: This button is usually on the opener unit itself.
- Step 2: Erase Codes: Hold down the Program button until the LED turns off, clearing all programmed remotes.
- Step 3: Reset the Remote: Press the Program button again and then press the button on the remote you want to program. The LED will blink, confirming the garage door remote reset.
Benefits and Considerations of Resetting Your Garage Door Remote
Resetting your garage door remote is a simple but important step in keeping your system secure and working properly.
One major benefit is enhanced security. If your remote has been lost or stolen, resetting it ensures that only authorized remotes can open your garage, protecting your home from unauthorized access. It’s also useful if you want to change your PIN or update your access code.
Another advantage is restored functionality. If your remote stops responding or works inconsistently, resetting it can often fix the problem and reestablish a strong connection with the garage door system.
Keep in mind that resetting clears all previously programmed remotes, so you’ll need to reprogram any others you use. Always check your owner’s manual for brand-specific instructions.
")
Troubleshooting Tips for Easy Garage Door Remote Reset
If you encounter issues during the process of resetting your garage door remote, there are several troubleshooting steps you can take to resolve the problem. These troubleshooting garage door remote tips will help ensure a successful reset and restore your garage door’s functionality.
1st Tips: Check the Batteries
If you encounter issues during the process of resetting your garage door remote, there are several troubleshooting steps you can take to resolve the problem. These troubleshooting garage door remote tips will help ensure a successful reset and restore your garage door’s functionality. To learn more, see how to change battery in a garage door opener.
2nd Tips: Verify the Remote and Opener Compatibility
Sometimes, issues arise because the remote is not compatible with your garage door opener. Double-check the model numbers of both the remote and the opener to ensure they are designed to work together. If they are not compatible, the reset process won’t be successful.
3rd Tips: Clear the Opener’s Memory
If the remote still doesn’t work after following the how to reset garage door remote steps, try clearing the opener’s memory completely. This will erase all previous remotes from the system, which might resolve any conflicts. After clearing the memory, proceed with reprogramming your remote.
4th Tips: Ensure Proper Distance During Programming
When reprogramming the remote, make sure you are within the correct range of the garage door opener. Standing too far away can prevent the remote from communicating with the opener, leading to a failed reset. Generally, being within 5 to 10 feet of the opener is ideal.
5th Tips: Check for Interference
Electronic interference from other devices, such as Wi-Fi routers, cordless phones, or nearby electronics, can disrupt the signal between the remote and the opener. If you suspect interference, try resetting the remote again after turning off nearby electronic devices.
6th Tips: Refer to the User Manual
If none of the above steps work, consult the user manual for your specific garage door opener. The manual often contains brand-specific troubleshooting garage door remote tips that can help you address more complex issues.
By following these troubleshooting steps, you can typically overcome most issues related to how to reset garage door remote. If problems persist, it may be worth contacting a professional to inspect your garage door system.
Safety Tips When Resetting Your Garage Door Remote
When resetting your garage door remote, it’s essential to follow some safety tips to ensure a secure and risk-free process. Here are a few garage door remote repair tips to keep in mind:
")
Safety Tips (1)
- Disconnect the Power: Before beginning any work on your garage door opener, disconnect the power to avoid accidental activation of the door. This prevents the door from moving unexpectedly while you’re working, reducing the risk of injury.
Safety Tips (2)
- Use a Stable Ladder: If you need to reach the garage door opener to reset the remote, make sure you use a sturdy ladder. Position it securely and have someone nearby to hold the ladder if necessary. This minimizes the risk of falls.
Safety Tips (3)
- Keep Hands Clear of Moving Parts: When working around the garage door opener, be mindful of any moving parts. Ensure your hands are clear of the door’s tracks, springs, and other mechanisms to avoid getting pinched or injured.
Safety Tips (4)
- Test the Remote Safely: After resetting the remote, test it while standing away from the door’s path. This precaution ensures that if the door moves unexpectedly, you’re not in harm’s way.
Safety Tips (5)
- Check for Obstructions: Before testing or using the remote, make sure the area around the garage door is clear of any obstructions, including people, pets, or objects.
How to Add a New Garage Door Remote Without Erasing Existing Ones
If you don’t want to erase the memory of your garage door opener and still want to add another remote, there’s a simple trick! Instead of holding the learn button, just press it once.
This quick tap tells the opener that you want to add a new remote without wiping out the ones you’ve already programmed. Once you press the learn button, grab your new remote, press its button, and voila — it’s synced! This way, you don’t lose the programming of your other remotes, and you can easily add more without any hassle.
At Northside Garage Door Systems, we make managing and upgrading your garage door setup even easier. Our experts can help you program new remotes, fix connection issues, and improve your overall garage door experience with reliable, professional service.
Call now at (317) 575-0983 or book online through our Book Now page to schedule your service today!
Frequently Asked Questions
How do I reset my garage door remote without a Learn button?
If your opener doesn’t have a Learn button, unplug the unit for 30–60 seconds to clear temporary memory, then reprogram the remote following your brand’s instructions.
Can I reset a single remote without affecting others?
No, most openers clear all remotes at once. After a reset, you’ll need to reprogram only the remotes you want active.
What do I do if my garage door remote stops working?
First, replace the battery. If it still doesn’t work, try reprogramming it with the opener’s Learn button. If issues persist, check for signal interference or consider replacing the remote.
How do I reset the keypad on a garage door opener?
Press and hold the Learn button until the indicator light blinks. Within 30 seconds, enter a new 4-digit PIN on the keypad and press Enter to save.
Do I need to reset after replacing the battery?
Usually no — remotes keep their programming after a battery change. But if the remote doesn’t respond, you may need to reprogram it.
Final Thoughts on Resetting Your Garage Door Remote
Resetting your garage door remote is a quick and important way to keep your garage door system secure and working smoothly. In this guide, you learned what a garage door remote does, how to identify your remote type, and the exact steps to reset it for popular brands.
By following these simple instructions and safety tips, you can easily restore your remote’s connection and ensure your garage door operates reliably. Whether you’ve lost your remote, moved to a new home, or are fixing a malfunction, knowing how to reset your garage door remote helps maintain both security and convenience.