If, when trying to open your door, your Chamberlain opener suddenly stops halfway, or doesn’t open at all, instead of guessing the reasons why, read this Chamberlain garage door opener troubleshooting guide. It gives you a clear path to follow. Find quick checks, easy fixes that are safe for DIY, and clear indications on when to call a garage door technician.
Do you own a Genie opener instead of a Chamberlain? View our Genie Garage Door Openers Troubleshooting Guide.
This one-minute checklist gathers the simple causes behind most common malfunctions:
Power:
- Check the outlet and ceiling plug. If the opener seems dead, test the outlet with a lamp.
Lock:
- Confirm that the wall control isn’t on “lock” or “vacation” mode.
- Ensure the door is not manually locked by a slide lock on the track or a padlock through the track holes.
Sensors:
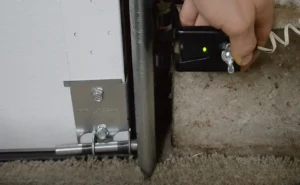
- Look at the safety sensors; if an LED is off or flickering, check for misalignment, obstruction, pinched cabling, or sunlight interference.
Remote:
- If the remote only works when you’re close, it may be due to a drained battery or interference from nearby LEDs or electronics.
Door movement:
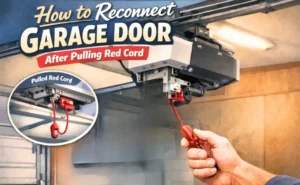
- With the door closed, pull the red release cord and manually lift the door. If it feels too heavy or binds, the issue is likely the door, not the opener.
Common Chamberlain Garage Door Opener Problems at a Glance
When there’s a garage door not opening or a garage door not closing, usually it’s one of the following situations:
- Door won’t close: Most likely the sensors are blocked or misaligned, or there’s door resistance (binding rollers, dirty track, or a sticky seal).
- Door won’t open or only moves a few inches: Commonly, it’s due to a heavy or unbalanced door (spring issue), a manual lock, or a jammed roller or track.
- Opener runs, but door doesn’t move: The trolley may be disengaged, the door arm may be loose, or the drive system may be sliding or stripped.
- Remote or keypad not working: Probable reasons are weak batteries, wall-control in lock mode, programming issues, interference, or a damaged keypad button.
- Blinking lights / error code: These generally indicate sensor issues, wiring faults, travel or force errors, overhead motor protection, or (depending on the model) control or logic board issues.
- Opener is noisy, grinding, or vibrating: Primarily caused by loose mounting hardware, wrong drive tension, worn rollers or internal gears, or lack of adequate lubrication.
Expert Tip: Take notes on what the opener does (sound, light flashes) every time there’s an issue, and if this happens while opening the door, closing it, or both. Detecting patterns helps to narrow down probable causes and find the real one.
Step-by-Step Chamberlain Troubleshooting Framework
After you’ve performed the basic checks, follow this step-by-step troubleshooting framework:

Step 1 – Look for safety hazards:
With the door closed, visually check for frayed cables, a spring gap, or bent hardware. Don’t touch springs, cables, or bottom brackets (they can be under high tension).

Step 2 – Check “no-move” blockers:
Check sensors, lock mode, and track the path. If the sensors are misaligned or blocked, the opener may not close.

Step 3 – Distinguish door issues from opener issues:
Pull the release cord and lift the door by hand. If it seems too heavy, binds, or doesn’t hold near mid-travel, there may be a door hardware or spring issue.

Step 4 – Check the sensors:
Check if both sensor lights are on and stable. Clean the lenses, straighten the brackets and ensure both sensors point at each other at the same height. Look for staples or screws that might be pinching the sensor wires.

Step 5 – Inspect controls and the Chamberlain Learn button:
Note the color of the Chamberlain Learn button and if the LED light is flashing following a pattern. The Learn button is used for programming or erasing remotes; the LED flashes Chamberlain error codes. Write any sequence you detect and check it in the owner’s manual.
Step 6 – Reset only what you need:
First, do a power cycle. If it’s a pairing or ownership issue, erase and reprogram remotes and keypads. Do a factory reset only if your owner’s manual recommends it.
(View our How to Reset a Garage Door Opener Easy Guide).
Step 7 – Test the door with small adjustments:
If the springs pass the basic checks and the problem is mild (like the door stopping a few inches from the floor), adjust travel limits following your manual. Make small modifications and re-test after each one.
Troubleshooting by Symptom (DIY Fixes That Actually Work)
Before you begin: garage door spring danger is real. Springs and lift wires store sufficient force to produce serious injuries. This Chamberlain troubleshooting guide is about safe checks and fixes, not spring winding.
The Chamberlain Door Won’t Close, but Opens Fine
- Start checking for physical obstructions and continue with the sensors.
- Clean the lenses, verify the LEDs look normal, check alignment and wiring (for loose connections or damage that could be weakening the signal).
- If the path is clear, adjust travel limits. Don’t increase force.
For detailed info on why the door won’t fully close, read this article by Chamberlain support.
The Door Reverses Before Touching the Floor
- Check for obstruction in the sensors’ path (debris, dirt, or misalignment). Clean if necessary or realign the sensors.
- If the door is not correctly balanced (or is too heavy), the opener may notice excessive resistance and reverse. Perform a door balance test.
The Door Won’t Open Fully or Stops Halfway
- Disengage the door and lift it manually through its full range. If it binds or gets stuck, think of hardware or spring problems.
- If the manual lift is smooth, set travel limits and verify power stability. If it still stops, it’s probably an internal opener fault.
The Opener Clicks, but Nothing Moves
A click with no movement means the opener got the command but didn’t start the motor drive.
- Make sure the door isn’t manually locked.
- Pull the emergency release and lift the door by hand. If it sticks or feels very heavy, there’s a door hardware issue needing attention.
The Motor Runs and the Chain or Belt Moves, but the Door Stays Still
This can be due to a disconnected trolley, a broken internal piece, or a slipped door arm connection.
Observe the trolley on the rail while you activate the opener. If it moves but the door doesn’t, check the door arm and the connection at the top bracket.
Expert Tip: If someone recently pulled the emergency release, re-engage the release latch, and run the opener to reconnect the trolley.
The Remote Works, but the Wall Button Doesn’t (and Vice Versa)
If the remote works, but the wall button doesn’t, inspect the wall control and its wiring:
- Check for loose, frayed, or disconnected wires at the button and the unit.
- Look for loose or damaged wall-control cabling at the button and opener terminals.
- Check all the wiring for wear, damage, or disconnections.
- Reattach loose connections, if any, and ensure all screws at the terminal are tightened.
- Examine the button for physical damage and debris.
Expert Tip: Check the diagnostic indicator beside the Learn button or the diagnostic codes on the wall control (if your model has them).
If the wall button works but the remote doesn’t:
- Check the remote’s battery, make sure lock mode is not on, and reprogram the remote (in case it’s a pairing issue).
- If the issue continues, check for radio interference, verify that the antenna wire hangs down, and reprogram the remote.
The Door Opens or Closes Randomly on Its Own
The rare cases of garage doors activating on their own are usually caused by human error or aging opener parts:
- A button on the remote may be stuck: Clean it to remove debris, or carefully disassemble the remote to clean the button contacts and membrane. If this doesn’t work, replace the battery. If this also fails, you may need to replace the remote.
- A shorted wall-mounted door control sending unsolicited signals to the opener or logic board: Unplug the opener and disconnect the two wall control wires at the opener terminal. If the problem stops, replace the wall control; if it persists, the wires may need replacement.
- If you use myQ app or smart-home integration, check users, schedules, and automation rules.

Chamberlain Error Codes & Blinking Light Meanings
A Chamberlain blinking light is a diagnostic message. Most diagnostic patterns appear on the indicator near the Learn button or as diagnostic codes on some wall controls.
The blinking patterns are Chamberlain error codes that indicate an issue. Observing the blink pattern to narrow the fault. Do a garage door balance test only if the code suggests a heavy or binding door.
Overhead Unit LED Flash Codes and Causes
On opener, the diagnostic LED usually flashes following a numbered pattern. Meanings vary depending on the model and logic board. These are common across many Chamberlain and LiftMaster units:
- 1 flash: Sensor circuit or wiring problem.
- 2 flashes: Shorted or reversed sensor wiring on the opener terminals
- 3 flashes: Wall control (door control) wiring problems, such as a shorted door control wire
- 4 flashes: Safety sensor alignment or beam blockage issues.
- 5 flashes: Motor overheated, can’t complete travel, usually caused by a binding or heavy door
- 6 flashes: Motor circuit failure
On some models, the LED blinks during programming or signal detection; confirm this pattern in your owner’s manual.
Safety Sensor Light Patterns (Steady vs. Blinking)
The photo-eyes also provide information with lights. One sensor sends the infrared beam; the other one receives it. On many models of the Chamberlain group:
- The sending sensor shows a steady yellow (or amber) light, and the receiver is steady green when aligned, and the wiring is in good condition.
- If the light is off or flickering, clean and realign the sensors and inspect the wiring.
How to Use Error Codes to Find the Fault Fast
Some Chamberlain models use a two-digit diagnostic code system with flashing LED light or Up and Down arrows on the motor unit or control panel. Each sequence corresponds to a specific issue. The first number corresponds to the flashes for the Up arrow (or red LED, depending on the model), then comes a pause, and then the second number that corresponds to the count of flashes for the Down arrow.
When a Chamberlain blinking light pattern keeps reappearing, consider it a to-do checklist:
- Look at the overhead LED, count the flashes, and note the flashing pattern.
- Check your model’s list of Chamberlain error codes in the owner’s manual or Chamberlain’s support page and search for that pattern.
- Make a basic check: sensor alignment, lens cleanliness, wiring at the opener, obstructing objects along the tracks, or any damage along them.
- If the code suggests a heavy or binding door, perform a garage door balance test. Disconnect the opener, lift the door halfway, and see if it remains close to where you left it.

Remote & Keypad Troubleshooting for Chamberlain Openers
If you have a garage keypad not working issue, you’ll most likely fix it with pairing, checking locks, and cleaning the memory. The idea is to reprogram Chamberlain remote only after disregarding battery problems and interference.
Among the common causes of a garage keypad not working is a weak or dead keypad battery. Change the remote and keypad batteries every 1 or 2 years. Write down the last replacement date
Expert Tip: Use a permanent marker and write down the replacement date in the battery compartment.
When the Remote Stops Working (Even With New Batteries)
- First, check if the wall control is not locked; this can block remote commands.
- Change the battery anyway (an unused battery stored in a drawer can be weak).
- If the remote operates only when you are right under the opener, consider possible LED bulb interference, weak battery, or the position of the antenna.
Other probable causes for a remote not working after battery replacement include stuck buttons or radio interference. For keypads, examine battery contacts, wiring (on wired models), and PIN.
How to Reprogram a Chamberlain Remote (Learn Button Steps)
- Press and release the Chamberlain Learn button on the opener.
- Within approximately 30 seconds, press the button on the remote.
- Wait for a light flash or a click to confirm pairing has been successful.
- Test the remote from inside the garage, then test it from your usual approach point in the driveway.
If your model has a control with a menu display, you can use it to add remotes.
If you have a Liftmaster opener and need to program it, our How to Program a Liftmaster Garage Door Opener, will be utmost helpful.
Expert Tip: Pair each remote at a time, then test them from the driveway.
Fixing a Chamberlain Keypad That Won’t Respond
A garage keypad not working is frequently caused by a power or PIN issue. Replace the battery, ensure the contacts are clean, close the cover firmly, and test again by entering your PIN and pressing ENTER.
If the keypad still doesn’t respond, reprogram it using the Learn button.
Clearing All Codes When You Move Into a New Home
If you moved into a new house where there’s a Chamberlain opener, perform a Chamberlain remote reset to remove old remotes and keypads from the system. For most models, simply press the Learn button for 6 seconds until the LED turns off.
After the reset, reprogram your remotes and keypad. If your opener or myQ hub is connected to an app account from the previous owner, remove the device from that account or perform a factory reset to add it to your own account.
Safety First: What You Should NOT Try to Fix Yourself
Even if you’re handy and accustomed to performing light garage opener maintenance, some fixes are too risky and should be avoided:
- Torsion springs and high-tension hardware fixes
- Frayed or off-drum wires
- Doors that are crooked or off the tracks
- Major structural damage to panels, tracks, or the opener mounting system
- Internal opener repairs (beyond basic programming or light adjustments)
- Burnt logic boards
- Complex electrical issues
Openers built after Jan 1, 1993, generally meet UL 325 entrapment-protection requirements and include safety labeling, as stated in the CPSC final rules for automatic residential garage door openers manufactured on or after that date.

Preventive Maintenance for Chamberlain Garage Door Openers
Periodic maintenance reduces failures and extends the lifespan of the door and the opener. Check these maintenance and garage door safety tips:
- Test the door balance twice a year.
- Lubricate moving parts (like hinges, rollers, and bearings) with a garage-door-rated lubricant.
- Inspect and clean the sensors
- Check hardware fasteners
- Test the backup battery periodically by unplugging the opener and running a full cycle
- If your opener has a battery backup, replace it every 1-2 years
Printable Chamberlain Troubleshooting Checklist (Free Download)
Before starting to work on diagnosing and fixing issues, it’s useful to have a checklist to follow. Download our helpful printable Chamberlain garage door checklist.
Our free one-page Quick Reference for Common Problems & Fixes guides you through the most common and fixable Chamberlain issues. Download it, print it, and keep it handy.
FAQs About Chamberlain Garage Door Opener Troubleshooting
Here are some of the most repeated Chamberlain FAQ troubleshooting questions:
Why won’t my Chamberlain door close, and lights flash?
Most flash code charts indicate safety sensors and wall control issues. Note the flashing sequence and search for its meaning.
What do 3 flashes mean on a Chamberlain opener?
Usually, 3 flashes point to a shorted wall control or wiring problems in it.
How do I pair a new Chamberlain remote?
Press and release the Learn button on the opener’s motor unit once. Within 30 seconds, press and hold the button on your remote until the opener’s light blinks or you hear some clicks from the motor unit. Release the button on the remote after the opener confirms pairing with a blink or a click, then test.
How do I erase old remotes after moving in?
For most models, hold the Learn button for 6 seconds until the LED turns off.
How often should I service my garage door opener?
Basic homeowner checks a few times a year help, but it’s recommended to call a professional inspection every year or two.
Why do my remotes have such a short range?
Usual causes are weak batteries, interference from electronics or LED bulbs, or tucked-up antennas.
If you did the basic checks and fixes indicated in this Chamberlain Garage Door Opener Troubleshooting Guide and your opener still has issues, it’s time for professionals to step in. For fast, reliable, local help, call Northside Garage Door System for a complete diagnosis and a long-lasting solution.
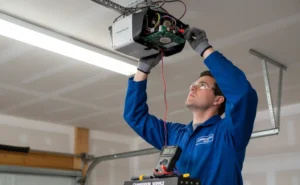
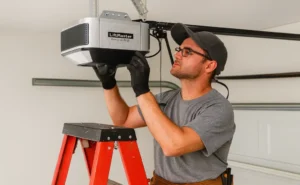
When to Call a Professional Chamberlain Technician
For your safety and for the system, some problems require a garage door technician, as explained in the section What You Should NOT Try to Fix Yourself. Besides those, if you tried all the basic checks and fixes and still get errors, contact an experienced Chamberlain technician.
In Indianapolis and the surrounding areas, Northside Garage Door System technicians are ready to evaluate your entire system and repair or replace Chamberlain openers, doors, sensors, wiring, and door hardware. Call us at 317-575-0983 or fill out our book now form for a professional and quick solution. If you have an emergency during the weekend, count on our staff too!