Garage door sensors stop the door when something blocks their path, keeping you and your property safe. But when they fall out of alignment, the door may not close or work properly.
This “How to Align Garage Door Sensors” guide covers everything you need — how to tell if your sensors are misaligned, what tools to use, and simple steps to realign them. A quick fix can save you time, money, and prevent safety risks. We have another detailed guide post on how garage door sensors work, you can check that out too if you want.

Garage door sensors are safety devices installed near the bottom of each side of the door. They send an invisible beam across the opening and stop or reverse the door if something breaks that beam — preventing accidents and damage.
These sensors are required for automatic garage doors and add an essential layer of protection. When they’re misaligned, the door may not close properly, so knowing how to realign them keeps your system safe and reliable.
Signs That Your Garage Door Sensors are Misaligned
Homeowners often ask, “how to tell if garage door sensors are aligned?” Having misaligned sensors can cause a lot of frustration, especially when your garage door doesn’t operate as it should.
So how do you know if your garage door sensors are out of alignment? Thankfully, there are a few telltale signs that can help you identify this issue before it becomes a bigger problem.
Sign 1: Door Reverses or Won’t Close Completely
A common sign of misaligned sensors is a garage door that won’t close fully and reverses unexpectedly. This happens when sensors detect a false obstruction due to poor alignment.
Sign 2: Blinking or Flashing Sensor Lights
Another sign is that garage door sensors have small indicator lights, and this sensor light is blinking. When aligned, the indicator lights stay steady. If one or both blink, the sensors are likely misaligned.
Sign 3: Inconsistent Door Operation
The door may close sometimes and stop midway other times. This inconsistency usually means slight misalignment is triggering the safety feature. Realigning the sensors restores smooth operation.
Sign 4: Simple Fix for Misaligned Sensors
If you’re experiencing any of these symptoms, it’s likely that your sensors are out of alignment.
Fortunately, fixing misaligned sensors is a simple process that can restore your garage door’s proper function and give you peace of mind.

Tools and Materials Needed for Alignment
Having the right tools makes aligning your garage door sensors easier. You only need a few basic items—most are common household tools.
Here’s a quick list of what you’ll need:
-
Screwdriver (Phillips/flathead) – loosen/tighten sensor brackets.
-
Level (bubble or laser) – ensure sensors are perfectly aligned.
-
Measuring Tape – confirm both sensors sit at the same height.
-
Soft Cloth – clean dust/debris from lenses.
-
Wrench – adjust nuts/bolts if brackets use them.
With these tools ready, you’re set to align your garage door sensors. Now, let’s go through the step-by-step process to get them working properly.
Step-by-Step Guide: How to Align Garage Door Sensors
Aligning your garage door sensors is straightforward and ensures your door operates safely and smoothly. Follow these simple steps to fix misalignment issues quickly.

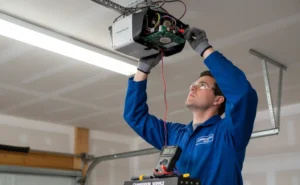
Step 1: Cut the Power
Before you begin, for safety reasons, cut the power to your garage door opener. You can either unplug it from the outlet or turn off the circuit breaker that supplies power to the opener. This step ensures that the door won’t accidentally move while you’re working on the sensors.

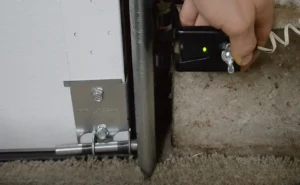
Step 2: Locate the Sensors and Check for Obstructions
Garage door sensors are located on either side of the door, near the ground. Inspect both sensors to make sure there’s nothing blocking their path. Sometimes, even small items like dust, cobwebs, or a loose leaf can interfere with the sensors’ alignment. Clean the sensor lenses gently with a soft cloth to remove any debris.

Step 3: Check Sensor Height, Position and Placement
Take a close look at both sensors to ensure they are positioned at the same height. Most sensors should be about 4 to 6 inches off the ground. Use a measuring tape to confirm they’re even. Uneven sensors are a common cause of alignment issues, and ensuring they are level can solve a lot of problems.

Step 4: Use a Level to Align Garage Sensors
Once you’ve verified that both sensors are at the same height, grab a level to check their alignment across from each other. Place the level across both sensors to see if they are perfectly aligned horizontally. If they’re off, gently adjust them until the level indicates they are lined up.
If you own a LiftMaster system, following these same steps will help with LiftMaster sensor alignment as well, since the process is nearly identical across major brands.
Step 5: Secure the Sensors
After adjusting the sensors, you’ll want to make sure they stay in place. Use a screwdriver to tighten the screws holding each sensor to its bracket. If your sensors are mounted with nuts or bolts, use a wrench to secure them. Be careful not to overtighten, as this could damage the sensors or make future adjustments difficult.

Step 6: Restore Power and Test
Now that you’ve made adjustments, it’s time to test the garage door sensors by restoring power to your garage door opener. Plug it back in or switch the breaker back on, and then try closing the door with the remote. If the sensors are aligned correctly, the door should close smoothly without reversing.
Step 7: Check Sensors Indicator Lights and Maintain Regularly
Knowing how to align garage door sensors is helpful, but it’s equally important to keep an eye on them over time. Regularly check for dust buildup, loose screws, or slight misalignment, especially if your garage door gets frequent use. Consistent maintenance will prevent small issues from turning into bigger ones later on.
With these easy steps, you now know how to align garage door sensors like a pro! Following this process will ensure your garage door sensors remain in top condition.
Benefits of Properly Aligned Garage Door Sensors
Keeping your garage door sensors aligned ensures smooth, safe, and efficient operation. It prevents accidents, extends the life of your system, and saves on repairs or energy costs.
Accident Prevention and Family Safety
One of the biggest sensor safety benefits is accident prevention. Properly aligned sensors ensure that the garage door will stop and reverse if anything—like a person, pet, or object—crosses its path.
This feature is essential for homes with children or pets, because it prevents accidents that could cause injuries. With aligned sensors, you can have peace of mind knowing your family and belongings are protected.
Smoother Garage Door Operation
Another benefit of alignment is smoother door operation. Misaligned sensors can cause your garage door to behave unpredictably, like refusing to close or reversing suddenly.
Keeping the sensors in line helps avoid these frustrating issues, which also reduces the strain on your garage door opener. This means your garage door system will last longer and require fewer repairs over time.
Energy Efficiency and Cost Savings
Aligned sensors also help you avoid unnecessary energy costs. When your door functions correctly, it seals properly when closed, keeping out drafts and reducing the strain on heating or cooling your garage.
Plus, a smoothly working door can save you on maintenance fees, as proper alignment reduces the likelihood of costly repairs.
Overall Benefits of Sensor Alignment
There are many sensor safety benefits to keeping your garage door sensors aligned. Learning how to align garage door sensors and maintaining that alignment can improve safety, enhance functionality, and even save you money.

Troubleshooting Common Sensor Issues
Even when you know how to align garage door sensors, you might still encounter some issues. Sometimes, sensors can be tricky, and other problems may pop up that interfere with their performance.
Here are some sensor align troubleshooting tips to help you diagnose and fix common issues so your garage door works smoothly.
Blinking Sensor Lights
One common issue is blinking sensor lights. If one or both of your sensor lights are flashing, this usually indicates a problem with alignment. Even a slight nudge can cause misalignment, especially if the sensors are bumped or knocked out of place.
Start by checking if both sensors are perfectly facing each other at the same height, and use a level to make sure they’re aligned. In rare cases, people search for ways on how to bypass garage door sensors, but this is not recommended as it disables critical safety features.
Dirt or Debris on Sensor Lenses
Another problem is dirt or debris on the sensor lenses. Sometimes, all you need is a quick clean to get things back on track.
Use a soft cloth to wipe each sensor lens gently, removing any dust or debris that could be interfering with the beam. This is an easy fix and can often solve issues without any additional adjustments.
Loose or Damaged Wiring
Loose wiring can also cause problems. If your garage door sensors are still acting up, inspect the wiring connected to each sensor. Look for any signs of wear, fraying, or disconnection.
Tightening the wires or reconnecting them securely can often resolve the issue. However, if the wiring appears damaged, it might be best to call a professional to avoid electrical issues.
Sunlight Interference
Lastly, check for interference from sunlight. In some cases, bright sunlight directly hitting the sensors can disrupt their function. You can try adjusting the angle of the sensors slightly or adding a small shade to block excessive sunlight.
These sensor align troubleshooting tips should help you get your garage door sensors back in working order.
Preventative Maintenance Tips for Garage Door Sensors
Keeping your garage door sensors in good shape doesn’t take much effort and can prevent issues down the line. With a few simple garage door maintenance tips, you can ensure that your sensors stay aligned and work correctly.
Tip Number 1:
First, make it a habit to clean your sensors regularly. Dust, dirt, and cobwebs can build up on the sensor lenses and interfere with their operation.
Gently wipe each sensor with a soft, dry cloth every few months to keep them clear. This simple step can prevent alignment issues caused by obstructed lenses.
Tip Number 2:
Another tip is to check the alignment periodically. Even if you know how to align garage door sensors, it’s wise to inspect them every few months to ensure they’re still properly positioned.
A quick glance can save you from dealing with unexpected misalignment and save you time and frustration.
Tip Number 3:
Lastly, check for loose screws or bolts. Sensors can shift out of place if the screws aren’t tight, especially with the vibrations from regular door use. Just grab a screwdriver to ensure everything is snug.
These garage door maintenance tips will keep your sensors in top condition, helping you avoid problems in the future. But sometimes alignment won’t solve the issue because the sensor itself is faulty.
In such cases, a garage door sensor replacement may be necessary. Replacing sensors is often straightforward and can restore full safety and performance to your garage door system.
Frequently Asked Questions
Why is my garage door sensor blinking green?
A blinking green light usually means the two sensors aren’t seeing each other clearly. Common causes:
- They’re a little out of line (not facing each other).
- Dirt, spiderwebs, or moisture on the lens.
- A loose wire or bad connection.
- Strong sunlight hitting a sensor and confusing it.
Fix: clean the lenses, make sure both sensors are the same height and pointing at each other, tighten their screws, and test again.
Why are both sensors green (or both lights on)?
If both lights are steady green it usually means sensors are aligned and working normally — that’s good.
If both are flashing or both are on but the door won’t close, it can mean:
- The opener thinks there’s still an obstruction (wiring or logic issue).
- A grounding or wiring fault at the opener.
- A safety/interlock setting or fault in the opener.
If lights look fine but the door won’t behave, check wiring at the opener and go through the troubleshooting section below (or call a pro if wiring looks damaged).
How to reset garage door sensors?
There’s no single universal “reset” button for sensors, but this general sequence acts like a reset:
- Turn off power to the opener (unplug it or flip the breaker).
- Wait 10–20 seconds.
- Inspect lenses, wiring, and mounts; clean and snug loose screws.
- Reposition sensors so they face each other and are the same height.
- Restore power and test the door.
If your opener has a “learn” or reset process (some brands do), follow the manufacturer instructions. If wiring appears damaged, call a technician.
How high should sensors be mounted?
Standard: about 4 to 6 inches (10–15 cm) above the floor.
The goal is to place them low enough to detect small objects but high enough to avoid kick-up dirt or splashes. Whatever height you pick, both sensors must be at the same height.
Can sunlight affect sensors?
Yes. Direct sunlight hitting the sensor can overload the receiver and make the opener think the beam is interrupted.
Quick fixes: shade the sensor, slightly angle the sensors so sunlight doesn’t hit them directly, or add a small sun shield. If sunlight is a constant problem, consider calling a pro for repositioning.
How to test garage door sensors?
Simple tests you can do now:
- Visual check: look at the LED lights — steady light = good; blinking/flicker = problem.
- Object test: with the door half-way down, place a small object (shoe, box) in the beam — the door should reverse when it hits the beam.
- Smartphone camera (optional): many phone cameras can see infrared — point your phone camera at a sensor; if you see a faint glow from one sensor, it’s emitting IR. (Not all phones work; it’s a quick helpful trick.)
- Wiring check: inspect sensor wires at the sensor and at the opener for loose or frayed wires. Only unplug/reconnect when power is off.
If tests fail, try cleaning, realigning, and testing again.
When to replace vs realign sensors?
Realign when: lights blink, door reverses, or minor movement knocked them out — try cleaning, tightening, and tiny adjustments first.
Replace when:
- The sensor LED doesn’t light at all even after checking wiring and power.
- Wiring is badly frayed or corroded.
- The sensor housing is cracked, waterlogged, or physically damaged.
- Repeated problems persist after alignment and wiring checks.
If in doubt, swap the sensors or call a technician — replacement sensors are inexpensive and simple to fit.
What if I bypass the sensors? (warning — don’t do it)
Do not bypass the safety sensors. Bypassing disables a critical safety feature that prevents the door from crushing people, pets, or objects. It’s dangerous and may be illegal in some places — and it can void warranties and insurance. If the sensors cause trouble, fix or replace them, or call a qualified technician. Never defeat safety devices for a quick workaround.

Final Thoughts: The Importance of Proper Sensor Alignment
Aligning garage door sensors is a simple task that makes a big difference in safety and reliability. Proper alignment prevents accidents, reduces repairs, and keeps your door running smoothly.
With a few basic tools and routine checks, you can keep your sensors in top shape. Cleaning, testing, and adjusting them regularly ensures long-term performance and peace of mind.
Stay proactive—correct alignment means a safer, more dependable garage door every time you use it.