Programming a garage door opener is an important task that every homeowner might need to do at some point. Whether you’ve just moved into a new home, installed a new garage door opener, or simply need to update your system for security reasons, knowing how to program a garage door opener is very important.
This process ensures that your garage door functions smoothly and securely, giving you peace of mind. By following a few simple steps, you can easily sync your garage door opener with your remote control or keypad, allowing for convenient access to your garage. In this guide, we’ll walk you through everything you need to know about how to program a garage door opener, covering the reasons for doing it, what you’ll need, and the exact steps to take.
")
A garage door opener is a motor-driven system that lets you open or close your garage door with a remote or keypad instead of lifting it by hand. It adds both convenience and security, especially when you’re short on time or carrying things.
The motor pulls a trolley along a track to raise or lower the door. Most modern openers include safety sensors and rolling codes to prevent unauthorized access.
There are a few main types of garage door openers, like belt and chain drive garage door openers, and each has its pros and cons. Chain-drive models use a metal chain—strong and reliable but noisier. Belt-drive openers use a rubber belt, which makes them much quieter and ideal for attached garages. Screw-drive openers use a threaded steel rod to move the door, offering good speed and low maintenance.
Choosing the right type depends on what matters most to you—quiet operation, durability, or lower maintenance.
How Garage Door Openers Work
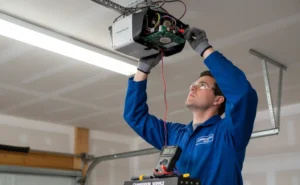
Are you wondering how garage door openers work? It’s an interesting process that relies on a combination of mechanical and electronic components. At the core of every garage door opener is a motor that powers the movement of the door.
When you press the button on your remote control or wall switch, the opener’s motor engages and drives a trolley along a metal rail. This trolley is connected to the garage door, and as it moves, it pulls the door up or pushes it down, depending on whether you’re opening or closing the door.
In addition to the motor and trolley, sensors play a critical role in how garage door openers work. These sensors detect if something is in the path of the door and will stop or reverse the door’s movement to prevent accidents. This safety feature ensures that the door operates smoothly while protecting people and objects from harm.
Reasons to Program Your Garage Door Opener
Programming your garage door opener keeps it working safely and smoothly. It syncs your remote with the motor so the door opens and closes properly.
If you lose a remote, move to a new home, or replace parts like the motor or remote, reprogramming and resetting your garage door remote is necessary. It removes old codes and ensures only your remotes can control the door, improving security.
Sometimes reprogramming also fixes issues like poor response or doors that won’t close fully. It’s a quick way to restore performance without calling a technician.
Whenever you upgrade or notice problems, reprogram the system. It’s a simple step that keeps your garage door reliable and your home secure.
Preparation Before Programming Your Garage Door Opener

Before you begin, review the opener’s manual, gather tools like a ladder and screwdriver, and ensure your remotes have fresh batteries. Many homeowners overlook this step, but if the remote isn’t working, it might just mean you need to know how to change a battery in a garage door opener before reprogramming.
First Preparation: Check the Opener’s Manual
Start by reviewing the manual that came with your garage door opener. It contains specific instructions for garage door opener programming based on your model, which can help you avoid common mistakes.
Second Preparation: Gather Necessary Tools
Make sure you have all the necessary tools on hand, such as a ladder, a small screwdriver, and fresh batteries for your remote control. These tools will be essential for reaching the opener and completing the garage door opener programming.
Third Preparation: Clear the Area
Ensure the area around your garage door is clear of any obstructions. This is important for safety and will help prevent any interruptions during the programming process.
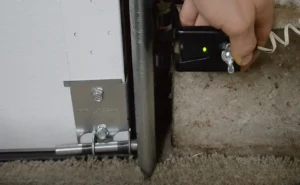
Fourth Preparation: Locate the Learn Button
Identify the ‘Learn’ or ‘Program’ button on your garage door opener. This button is important for syncing your remote control or keypad with the opener.
Fifth Preparation: Test the Existing Setup
If you’re reprogramming, test the current setup to identify any issues that may need addressing before starting the garage door opener programming. This step will also help you better understand how to program a garage door opener and ensure everything is working as it should.
By following this checklist, you can ensure that your garage door opener programming is quick, safe, and successful.
")
What You Need to Program Your Garage Door Opener
Before you start programming your garage door opener, it’s important to gather all the necessary tools and materials to ensure the process goes smoothly. Here’s what you’ll need:
- Remote Control: You’ll need the remote control that you intend to sync with your garage door opener. This is a key component in how to program a garage door opener.
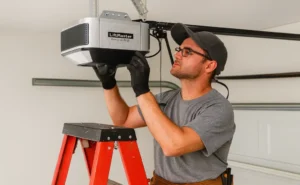
- Step Ladder: A sturdy step ladder is essential to safely reach the garage door opener, which is usually mounted on the ceiling.
- Small Screwdriver: Depending on your opener model, you may need a small screwdriver to open any panels or access the ‘Learn’ button.
- Fresh Batteries: Ensure the remote control has fresh batteries. This simple step is often overlooked but is crucial for successful programming.
- Opener Manual: Keep the garage door opener manual nearby. It contains specific instructions and troubleshooting tips tailored to your model.
By having these tools and materials ready, you’ll have everything necessary for your garage door opener programming needs.

Step-by-Step Process for How to Program a Garage Door Opener
Programming a garage door opener might seem tricky, but with a few simple steps, you can do it yourself in no time. Here’s a step-by-step guide to help you through the process:
 Gather Your Materials")
Step 1: Gather Your Materials
Before you start, make sure you have everything you need. This includes your garage door opener’s remote control, fresh batteries, a step ladder, and the opener’s manual. Understanding garage door opener programming begins with being fully prepared.
 Locate the 'Learn' Button")
Step 2: Locate the 'Learn' Button
Most garage door openers have a ‘Learn’ or ‘Program’ button on the motor housing. This button is usually located on the back or side of the unit, often near the antenna wire. Using a step ladder, carefully locate this button. Press it once; a light may flash, indicating that the opener is ready to be programmed.
 Program the Remote Control")
Step 3: Program the Remote Control
With the ‘Learn’ button activated, press and hold the button on your remote control that you wish to sync with the opener. Hold it for about 3-5 seconds, or until the opener’s lights blink or you hear a click. This signals that the remote has been successfully programmed. At this point, you’ve completed the main step in how to program a garage door opener.

Step 4: Test the Remote
After programming, it’s important to test the remote to ensure it’s working properly. Stand a reasonable distance from the garage door and press the remote button. The door should open or close in response. If it doesn’t, you may need to repeat the steps or consult your manual for troubleshooting tips. Testing is an essential part of how to program a garage door opener to ensure everything is functioning as expected.

Step 5: Program Additional Remotes or Keypads (Optional)
If you have additional remotes or a keypad that you’d like to program, repeat the process for each device. Most openers allow multiple remotes to be synced, which is helpful for families with several cars. Knowing how to program a garage door opener for multiple devices ensures that everyone in your household has convenient access.

Step 6: Final Adjustments
After programming all necessary devices, double-check that the garage door operates smoothly from both the remote and any wall-mounted controls. If the door doesn’t function correctly, you might need to adjust the opener settings or refer back to the manual. These final checks are the last step in learning to program a garage door opener.
")
Step 7: Secure the Opener
Once everything is programmed and tested, make sure to secure the motor housing by replacing any covers or panels that were removed. Keep the remote controls in a safe place, and consider labeling them if you have multiple devices programmed.
By following these steps, you’ll have a clear understanding of how to program a garage door opener and will be able to ensure your garage door operates smoothly and securely. This simple process can save you time and provide the peace of mind that your home is protected.
Benefits and Considerations of Re-Programming Your Garage Door Opener
Reprogramming your garage door opener improves security and performance. It removes old access codes, so only your current remotes and keypads work—important if one gets lost or stolen. It can also fix issues like weak signals or remotes that stop responding.
It’s useful when adding new devices too. Reprogramming connects new remotes or keypads to your opener, keeping everything working smoothly without replacing the system.
The downside is that it takes some time and can be tricky if you’re not familiar with the process. You might need a technician’s help, which adds cost. If you lose remotes often or have several users, it may need to be done repeatedly.
Still, it’s a simple way to boost safety, restore smooth operation, and keep your opener up to date.
Troubleshooting Common Issues and Solutions (All Brands)
When you encounter issues with your garage door opener, it can be frustrating, but many common problems have simple solutions. Understanding troubleshooting a garage door opener across various brands can help you resolve these issues quickly and effectively. Here are some typical problems and their fixes:
Issue 1: Remote Control Not Working
If your remote control isn’t responding, the first step in troubleshooting a garage door opener is to check the batteries. Replace them with fresh ones and try again. If the problem persists, ensure that the remote is properly programmed. Refer to the manual or follow the steps outlined in how to program a garage door opener to re-sync the remote.
Issue 2: Door Doesn’t Close All the Way
Sometimes, the garage door may stop short of closing fully. This could be due to an obstruction or a misaligned sensor. Check for any objects blocking the door’s path and ensure the sensors are clean and aligned correctly. Adjust the sensors if needed, which is a common step in troubleshooting a garage door opener.

Issue 3: Opener Motor Runs But the Door Doesn’t Move
If you hear the motor running but the door isn’t moving, the issue might be with the garage door opener’s drive mechanism. For chain or belt-drive openers, inspect the chain or belt for any signs of wear or damage. If they appear loose, they may need tightening or replacing. Additionally, check the trolley to ensure it is engaged properly. These checks are essential parts of troubleshooting a garage door opener.
Issue 4: Keypad or Wall Switch Isn’t Responding
If the keypad or wall switch doesn’t work, start by checking the wiring. Loose or disconnected wires could be the culprit. Make sure everything is connected securely, then reset the keypad using the garage door opener programming instructions.
Safety Tips When Programming Your Garage Door Opener
When learning to program a garage door opener, safety should always be your top priority. Here are some essential garage door opener safety tips to keep in mind:
Disconnect the Power: Before starting, always disconnect the power to the garage door opener to prevent any accidental activation during the programming process.
")
Use a Stable Ladder: Ensure your ladder is stable and positioned on a flat surface when reaching the motor unit. This simple step is crucial for preventing falls.
Keep Hands Clear: When testing the opener, keep your hands and tools clear of the moving parts to avoid injury.
Frequently Asked Questions
How do I program my Chamberlain garage door opener?
To program your Chamberlain garage door opener, press the "Learn" button on the motor unit. Within 30 seconds, press the button on the remote control that you want to use. The opener's lights may blink or you may hear a click, indicating successful programming. Always refer to your specific model's manual for detailed instructions.
Can I reprogram without a remote?
Yes, you can reprogram certain Chamberlain openers using a keypad. First, press the "Learn" button on the motor. Next, enter your desired code on the keypad and press "Enter." The opener should respond with a light blink or click. Note that some models may require the original remote for complete reprogramming.
Where is the Learn Button located?
The "Learn" button is typically found on the back or side of the garage door opener motor unit, near the antenna wire. On most Chamberlain models, it is a square or circular button, sometimes located under a small cover. The button color varies by model and is commonly red, purple, or yellow.
How do I reset my Chamberlain garage door opener?
To reset your opener, press and hold the "Learn" button for about 6 to 10 seconds until the LED light turns off. This action will erase all programmed remotes and keypads, allowing you to start fresh.
How can I add a new remote without affecting existing ones?
Briefly press the "Learn" button, then press the button on the new remote within 30 seconds. This process will add only the new remote, and all existing remotes will remain programmed.
Final Thoughts
Programming a garage door opener may seem challenging at first, but with the right approach, it’s a task that can be easily managed by any homeowner! By understanding how to program a garage door opener, you can ensure that your garage door operates smoothly and securely. From gathering the necessary tools and following a clear step-by-step process to troubleshooting common issues and keeping safety in mind, each step plays an important role in achieving success.
Remember, the key to effective programming is preparation, attention to detail, and following the instructions specific to your opener model. Whether you’re reprogramming due to a new remote or resolving a malfunction, knowing how to program a garage door opener can save you time and provide peace of mind. With the right knowledge and a bit of patience, you can keep your garage door working perfectly for years to come.